28 December 2011

Collision Detection on Canvas

I was toying around with a bouncing ball on an HTML canvas the other day when I wanted to find an easy way to detect collisions. One thing that is easy is validating against the bounds of the canvas. This is done with a simple check on the bounds of the canvas as follows:

//this is a Ball object
if (this.position.y > bound.y2) {
    this.velocity.x2 = -this.velocity.x2 * drag;
    this.position.y = bound.y2;
} else if (this.position.y < bound.y1) {
    this.velocity.x2 = -this.velocity.x2 * drag;
    this.position.y = bound.y1;
}
if (this.position.x < bound.x1) {
    this.velocity.x1 = -this.velocity.x1 * drag;
    this.position.x = bound.x1;
} else {
    if (this.position.x > bound.x2) {
        this.velocity.x1 = -this.velocity.x1 * drag;
        this.position.x = bound.x2;
    }
}

You’ll see that if we get the Ball beyond the bounds of either axis we reverse the velocity vector (and for my example) I augment that vector with some drag. Then I start the Ball off (headed the other direction now) from the start of the boundary. This is straight forward and not too difficult to come up with. The same can be done for other shapes on the canvas which we do not wish for the ball to pass through. These again can be simple if we know the layout and the position of the target walls (think floating boxes). Where this gets to a point where the shapes are not at right angles or the boundaries have become more arbitrary, I no longer want to calculate each possible collision point. I also do not wish to wrap the object into a larger boundary box to utilize for detection. So a more elegant solution can be found. If we, just before moving the ball, simulate the move and have another means for detection we can then change the trajectory of the object and send it sailing away. Here’s what we need. we need a ball sized snapshot of the canvas where we plan to put the ball on the next move. We then iterate through those pixels on the image and find ones that arent the color of our background (in my case non-white). To do this without also seeing the ball as a collided upon object, I’ll clear the canvas of the ball first. Here is the code:

//clear canvas, add shape
context.clearRect(0, 0, canvasWidth, canvasHeight);

context.fillStyle = "rgb(150,150,150)"; //not white
context.beginPath();
context.moveTo(200, 100);
context.lineTo(300, 125);
context.lineTo(250, 175);
context.lineTo(200, 200);
context.lineTo(200, 100);
context.fill();
context.closePath();

//now we check our next move for collision
var imgData = context.getImageData(this.position.x + this.velocity.x1, this.position.y + this.velocity.x2, r, r);
var pix = imgData.data;
for (var i = 0; n = pix.length, i < n; i += 4) {
    //check if we're not on a white pixel
    if (pix[i] != 0) { 
        this.collided = true; 
        //bounce away
        if (Math.abs(this.velocity.x1) > Math.abs(this.velocity.x2)){
            this.velocity.x1 = -this.velocity.x1 * drag;
        } else {
            this.velocity.x2 = -this.velocity.x2 * drag;
        }
        break;
    } else {
        this.collided = false;
    }

}

Thats it! Now we can throw our ball at a target. The demo I have is located at this jsFiddle.

23 December 2011

Book Review: The Tangled Web

Browsers are not secure. They won’t ever be invincible to malicious attacks. Browser A does not serve the same set of security mechanisms as Browser B. These points are highlighted in Michal Zalewski’s book “The Tangled Web: A Guide to Securing Modern Web Applications”, but Zalewski, an expert in browser security and author of Google’s Browser Security Handbook, discusses in detail common and known vulnerabilities, providing hints and tips to keep web applications as secure as possible along the way.

The book starts with a relatively exhaustive dissection of the “Anatomy of the Web”, highlighting the history of the web, from HTTP up to Plug-ins such as Flash and Silverlight all while noting some of the varying browser implementations of many common web functionalities. For example when discussing the Content-Disposition Header, Zalewski notes that these headers “are truncated at NUL by Internet Explorer, Firefox, and Chrome but not by Opera or Safari”,

In parts Two and Three of the book, the meat of browser security features are discussed in depth. Highlights include a detailed look at the Same Origin Policy for all aspects of the modern web, including Scripts, XHR, Cookies, and Plugins. Another intriguing look into browser inner workings was the sections on special psuedo urls such as about:, javascript:, and data: and how these can lead to interesting handlings of the origination of the requests across browser implementations. For example about:blank can be navigated to from an Existing non-same-origin page and have its origin inherited from the caller in Firefox, Webkit, and Opera while gaining a unique origin in Internet Explorer.

Perhaps one the most valuable parts of “The Tangled Web” is how Zalewski adds a handy “Security Engineering Cheat Sheet” to the end of each chapter. Having these quick tips at ones fingertips is a remarkable asset and great addition to the book. I could continue to outline the great parts of this book, and tout the security expertise that jumps from the pages, but the most important parts in the book are what each reader takes away. Whether its a small attack vector that a reader picks up on to close a vulnerability in their own web application, or an interesting fact about browser inconsistencies, each reader should gain something from this book. For me, the take away is that as a developer there is no magic bullet and we will always uncover new security holes in our web applications, either from poor programming, or new features of a browser’s implementation. And that our expectations should not be that we have a perfectly impenetrable web, or are capable of producing one. Zalewski puts it like this, “As the complexity of our online interactions approaches that of real life, the odds of designing perfectly secure software are rapidly diminishing”

19 December 2011

Canvas, History, Local Storage and More

A few months ago I entered the August Mozilla Dev Derby, which focused on the History API. I have seen some of the amazing things that the new changes to this interface have been able to make from folks like Facebook and GitHub but I wanted to try something a little different. I had been hacking on a simple drawing canvas and decided that I could leverage the History API to create a more application like experience. Since winning the Derby, I’ve seen my code improved and extended in a later Dev Derby Entry, and I turned it into a sample application for Mozilla’s new App experience. Here’s a peek into the process of creating a drawing demo like the one I created.

Basic Setup

Firstly, we’re going to need to create a canvas. This is pretty straightforward for those who have done this sort of thing before, but for a reminder that can look like the following
    <!DOCTYPE html>
    <html>
    <body>
     <div id="content">
        <canvas id="canvas" height="500" width="500"></canvas>
     </div>
    </body>
    </html>
Now that we have our canvas we can start to initialize it and get ready to roll with the fun features we’d like to demonstrate.
var canvas = document.getElementById("canvas"),
    ctx = canvas.getContext("2d"),
    img, //more about this later
    blankCanvas = true; //this too
We now need to set it up to allow for drawing. This is done by adding a event listeners to the mouse events we’d like to watch.
window.addEventListener("mousedown", setupDraw, false);
window.addEventListener("mousemove", setupDraw, false);
window.addEventListener("mouseup", setupDraw, false);
You’ll notice the setupDraw function is called on all of these events. This function will grab the coordinates of our pointer (less the offset of our lovely #content div and send those to our draw object.
function setupDraw(event) {
    var cnt = document.getElementById("content"),
        coordinates = {
            x: event.pageX - cnt.offsetLeft,
            y: event.pageY - cnt.offsetTop
          };
    draw[event.type](coordinates);
};
Now time for the drawing I’ll go ahead and let you peek at the source so you can follow along.
var draw = {
    isDrawing: false,
    mousedown: function(coordinates) {
        ctx.beginPath();
        ctx.moveTo(coordinates.x, coordinates.y);
        this.isDrawing = true;
    },
    mousemove: function(coordinates) {
        if (this.isDrawing) {
            ctx.lineTo(coordinates.x, coordinates.y);
            ctx.stroke();
        }
    },
    mouseup: function(coordinates) {
        this.isDrawing = false;
        ctx.lineTo(coordinates.x, coordinates.y);
        ctx.stroke();
        ctx.closePath();
      }
};
You’ll see this object directs to an event type specific function and handles the coordinates parameters which are passed into the object. Following some basic canvas drawing steps for ctx.beginPath() -> ctx.moveTo(x,y) -> ctx.lineTo(x,y) -> ctx.stroke() -> ctx.closePath() we now have the ability to draw with our mouse. The “isDrawing” property is there to let us know to continue our strokes on mousemove. Now that we have an example that allows us to draw, we’ll move forward to make it more interesting by utilizing the History API and LocalStorage.

About the History API

One of the new features in HTML5 (an subject of the Dev Derby) is the additional features of the History API. These are history.pushState(data,title [,url]) and history.replaceState(data, title [,url] ) which are utilized to directly push (or replace) data in the session history. For the purposes of this demo we’ll be using pushState to add data, specifically the image data from the canvas, to the current URL. Now this alone is not enough we will also need to know when the current state changes, which is made accessible to us via the window.onpopstate event. This event fires when the browser gets a new history event. We can inspect the event to see if it contains a state and then load the data (hopefully our image) into the canvas. So to get things wired up correctly, its time to add a function to store the history.
var storeHistory = function () {
    img = canvas.toDataURL("image/png");
    history.pushState({ imageData: img }, "", window.location.href);
};
This grabs the data from the canvas in the form of a “data:image/png…” url. Then we create a new history state by pushing an imageData attribute for later retrieval. Now, before we add the calls to storeHistory to our drawing application, we need to do a bit of preventative maintenance. If we store this data and navigate backward without a reinitialization of the canvas, we will just draw the stored imageData onto the existing image. To us this will look like it isn’t working so we need to add an initialization function to reset our canvas.
var initializeCvs = function () {
    ctx.lineCap = "round";
    ctx.save();
    ctx.fillStyle = '#ffffff';
    ctx.fillRect(0, 0, ctx.canvas.width, ctx.canvas.height);
    ctx.restore();
}
Now we can go about the business of storing our history states. The code that follows will store history in two places. The first place it stores is if the canvas is blank it stores that before drawing anything. The second is on the mouseup event after the line is completed. Now our draw object looks like this:
var draw = {
    isDrawing: false,
    mousedown: function(coordinates) {
        if (blankCanvas) { storeHistory(); blankCanvas = false; }
        ctx.beginPath();
        ctx.moveTo(coordinates.x, coordinates.y);
        this.isDrawing = true;
    },
    mousemove: function(coordinates) {
        if (this.isDrawing) {
            ctx.lineTo(coordinates.x, coordinates.y);
            ctx.stroke();
        }
    },
    mouseup: function(coordinates) {
        this.isDrawing = false;
        ctx.lineTo(coordinates.x, coordinates.y);
        ctx.stroke();
        ctx.closePath();
        storeHistory();
    }
};
Awesome, now we have started storing history on the page with each completed line. Now we need to be able to see the results of this work when the history state changes. As I mentioned earlier this is done via the window.onpopstate event. We will examine the imageData of the state (if it exists) and place that image on the canvas as follows:
 window.onpopstate = function (event) {
        if (event.state !== null) {
            img = new Image();
            img.onload =function () {
                ctx.drawImage(img, 0, 0);
            };
            img.src = event.state.imageData;
        }
    };
Splendid, we now have a drawing tool that stores history so we can undo and redo drawings. But wait! What happens if I’m in the middle of a canvas masterpiece and my browser crashes? Lets handle that with localStorage. With localStorage we can store a named item locally independent of our session, so in the event of leaving the page, we can retrieve data from our previous encounter. In this demo I did a simple test of the window.localStorage object to see if we can store data, and then I store the latest image so upon return you’ll at least be able to recover that data. Here are the initializeCanvas and storeHistory functions with this additional feature added:
var initializeCvs = function () {
    ctx.lineCap = "round";
    ctx.save();
    ctx.fillStyle = '#ffffff';
    ctx.fillRect(0, 0, ctx.canvas.width, ctx.canvas.height);
    ctx.restore();

    if (window.localStorage) {
        img = new Image();
        img.onload = function () {
            ctx.drawImage(img, 0, 0);
        };
        if (localStorage.curImg) {
            img.src = localStorage.curImg;
            blankCanvas = false;
        }
    }
}

var storeHistory = function () {
    img = canvas.toDataURL("image/png");
    history.pushState({ imageData: img }, "", window.location.href);

    if (window.localStorage) { localStorage.curImg = img; }
};
You can see the full working demo in this jsFiddle.
11 November 2011

Moving to Octopress

I started blogging here a while back, mostly about the cloud and what I could do with my cool new chromebook the cr-48.  I've hacked around a bit in the cloud using Chrome OS, but I find myself enjoying Ubuntu on my cr-48 more than Chrome OS.  In my playing around with different sites, IDEs, tools, and engines I came across Octopress and thought it would be fun to try it out.  So I did and I liked it.  From there I decided to move my blog over there for future posts.  I went through the work to convert these blogger posts from here -> go-cloud-go.blogspot.com (now blog.cgack.com)  to their new home at cgack.com/blog but they likely aren't all picture perfect so if there are broken links or anything I apologize.  So there you have it. this blog is moving to its new home at cgack.com/blog

24 October 2011

Firefox Add-on Automated Updates

Since Firefox moved to a rapid release cycle, there has been concern by some (including myself) as to whether add-ons would stay compatible with each of the new versions, and how one would go about testing to find any breaking changes.  In news that makes a geek happy - Mozilla has taken care of that for me as I received notice from Mozilla that stated:
Dear add-on author,

Good news! Our automated tests did not detect any compatibility issues with your add-on Google Music Hotkeys and Firefox 9.*. We've updated your add-on's compatibility to work with Firefox 9.* so that our Aurora users can begin using it.
This compatibility bump is server-side and we did not modify your add-on package in any way. If you wish or need to revert this change, just go to your add-on edit page on addons.mozilla.org, select the Status & Versions page, then the version, and change its maxVersion compatibility back to its previous value.

For more information on our new compatibility process with rapid Firefox releases, please read this post: http://blog.mozilla.com/addons/2011/04/19/add-on-compatibility-rapid-releases/

22 October 2011

Snakes in the Cloud


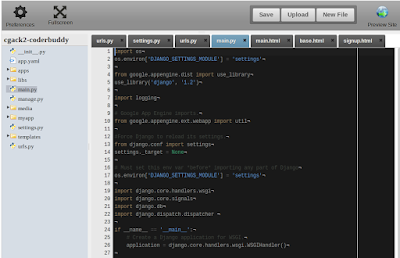
I used to think that building web applications in Python for Google's app engine was reserved for a desktop development environment.  I had hacked a bit on an app or two and used the command line tools to test and publish to the app engine.  Then I discovered CoderBuddy.   CoderBuddy is a one stop shop for building python apps for the app engine.  Once signed in you can create a blank project, or get a head start with one of six template apps.  One template is of course a "hello world" app, but there are a  few other samples including 3 that come with some Django (arguably the go to MVC framework for python web applications).   I tested a couple of the template apps and found them to be quite useful.  The "Adrian Remembers Me" template creates an app that allows users to become members and sign in.   Here is a look at the editor with the main.py file opened for this project:


Each of these templates could be either a good launching point or reference for a new developer looking to quickly create a Python app.  Deploying to the App Engine is just a few clicks away with CoderBuddy.  So I "created" my Adrian Remembers Me app in one click and about two minutes later had my site running on the app engine at http://cgack2-coderbuddy.appspot.com/.  The ease of deploy along with the ability to upload files and download the project as a .zip I will definitely look to CoderBuddy for part if not all of my next project.

02 September 2011

Cloud 9 adds Heroku Support

One of my favorite online IDEs has added support for Heroku.  This is great news as I have enjoyed developing node.js applications in Cloud9 but felt that the main thing it lacked was a method to deploy directly to the cloud.  So I took it for a test run.  I signed in to Cloud 9 and created a simple hello world app, make sure you use the process.env.PORT to listen on so Heroku can deploy it properly.

Commit your changes via the Cloud 9 git interface. Then all you have to do is click the Deploy button in Cloud 9, sign in to Heroku, create your new instance, and deploy. If you haven't created a package.json or Procfile (needed for Heroku deploy), Cloud 9 will create those for you. My hello world is at http://cheese.herokuapp.com/

24 August 2011

github goes ace (and demos)

A week ago GitHub announced they were incorporating the Ace editor (which powers the Cloud9 IDE).  Since I am a fan of both Cloud9 and GitHub, I gave it a whirl on my GitHub Pages site and was not disappointed.  As advertised one can easily open a file for editing, preview the diff of your changes and commit.  I think it will likely become useful to edit posts when (if) I finally decide to move my blog from here at Blogger to Octopress (just because it looks fun).  For me, this is particularly useful for simple changes like those I have made to my demos and experiments.  Speaking of demos, I had created a simple drawing app using HTML5 canvas for my preschooler which evolved into a demo of the HTML5 History API thanks to a tweet by Christian Heilmann and subsequent read of his blog post.  I decided to use this History API to create the undo/redo functionality that I rely on heavily if i'm trying to draw something in a painting tool.  As a bonus I added a localStorage call that will recreate your last drawing if your browser closes or you are forced to leave the site for a while.  What does that look like:

 I entered the demo in the DevDerby, you can find it here.  I hope you 'like' it too.  (note: I've only really tested my demo on firefox 5, 6, 7, and 8 as well as chrome 13 & 14, so your results may vary if you use a different browser)

07 July 2011

Chrome Dev Tools as an IDE

I've spent a lot of time trying to find the best development method in Chrome OS.  Recently I decided I wanted to create a chrome extension using Chrome OS.  My first stop was CodeRun IDE which has a sample Chrome Extension project so I thought it would be great for a starter.  The development is pretty mess free, but the problem comes once its downloaded.  It comes downloaded and zipped.  When loading an unpackaged Chrome Extension you can point Chrome to a directory, but not a zipped directory.  So I had to unzip the files...which was pretty easy to do once I found wobzip.

Now that I had a skeleton Chrome Extension up and running, I could start to make it my own.  I decided on a simple calculator for starters, plus I thought it might be useful.  I have to admit it had been a while since I'd used the user 'chronos' in Developer mode, but once I got it there I found that Chrome OS had a new default text editor (thankfully) in 'vi'.  This is where it got really fun.  I edited my popup.html file to have a stylesheet and JavaScript file and loaded the html directly in Chrome.  Enter the best web app ever... Chrome Dev Tools.

With Dev tools I am able to make changes to my stylesheets through the inspector to get the style just how I want, then save the modified .css file to the extension directory.
 Similarly, I can edit and save versions of my JavaScript file directly from Dev tools.  The only issue with this is when I overlooked some invalid code which prevented Chrome from loading the JavaScript file.  This was not much of an issue the one time it happened to me, as I was able to enter vi and quickly rectify the rogue curly brace and was back to Dev Tools in no time.  So If you ask me what my choice is for rapid JavaScript development, I'll say Chrome Dev Tools.

 The result from blank files to:


and

06 June 2011

I Cloud

Earlier today Apple announced a revolutionary set of services called iCloud.  I must say it sounds incredible to be able to edit a document, sync contacts, view my calendar, listen to music, read my electronic books, view my photos, and access my email from any internet enabled device. , It does seem like a great advantage to not have to upload to a cloud music service like the Amazon Cloud Player or Google Music, which iCloud offers via iTunes "scan and match" and I'm certain it will be another service I try in my attempt to find the best cloud experience.   I've been happily clouding for some time now, and hope that Apple does good things in the space.  Happy clouding.

01 June 2011

Chromebook first dibs

Being a test pilot has some perks.  The latest of which is a special invitation to early released Chromebooks via the Gilt Groupe.  Below is the email I received earlier today inviting me to Gilt's privileged offering of the newest Chromebook.


Be the first to get a Chromebook.
Since we announced the Chrome Notebook Pilot Program back in December, we’ve been humbled by the amount of interest that we’ve received from users like you.
We’re excited about the brand-new Samsung Chromebook that goes on sale on June 15. Fortunately, we’ve managed to get our hands on a few machines a little earlier, and we’d like to make these available to you, our biggest enthusiasts.
When you buy your Chromebook, you’ll also be getting a limited edition, custom-fit Chrome sleeve designed by Rickshaw so you can carry your new Chromebook in style.
Our good friends over at Gilt, the premier invitation-only shopping site, have agreed to put these Chromebooks up for sale -- but only for a very limited time.
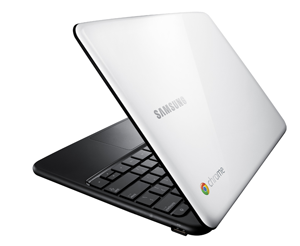
Samsung Series 5 Chromebook

24 May 2011

Duostack acquired by dotCloud

A few weeks ago I wrote about utilizing the Duostack platform as a service to host a Node.js application on the cloud.  Today Duostack announced they were joining forces with dotCloud, another platform as a service provider.  Here is the announcement as I received it:

 Duostack Announcement - May 24, 2011

We are pleased to announce that Duostack is joining forces with DotCloud.
 
DotCloud is a Platform as a Service that provides unsurpassed flexibility. Developers have the freedom to assemble their own deployment environment by selecting stack components on DotCloud, instead of being restricted to a limited stack configuration typical of cloud platforms. Supported components include PHP, Ruby, Python, Perl, Java, Node.js, MySQL, Redis, RabbitMQ, Solr, PostgreSQL, and now MongoDB.
 
As part of DotCloud, we will continue to raise the bar for cloud platforms and further our commitment as the best place to deploy apps.
 
See the full acquisition announcement here:
 
What does this mean for apps hosted on Duostack?
Current Duostack developers will receive immediate access to DotCloud. Invite codes will be delivered by email.
 
Apps currently hosted on Duostack will remain online through the end of June 2011. We will provide assistance for migrating apps to DotCloud. More information about the transition will be available this week.
 
The Duostack name will be phased out. However, the best parts of the Duostack platform and the feedback from our beta program will be incorporated into DotCloud. This starts today as DotCloud launches support for MongoDB, and there is plenty more to come.
 
We are very happy to welcome you to DotCloud.

12 May 2011

Chromebooks!

Yesterday, at Day 2 of Google I/O, it was officially announced that Chromebooks will be available in retail locations worldwide starting June 15th.  Perhaps even more exciting news was the mention that for Educational institutions (and businesses) these would be available at $20/month/user ($28/mo/user for business) which could be a huge savings (70% over traditional PCs according to the graphic here).

Here is the Keynote from Google I/O day two for those who missed it:

01 May 2011

Duostack: Cloud Platform as a Service

I have been using and trying many of the all-in-one solutions for web-based development on my Cr-48, but what happens when your favorite editor does not deploy directly to where you want your app to live (cloud9)?  I tried this recently with a NodeJS app and a cloud platform (currently in beta) called Duostack.  For my NodeJS app, just as everyone else toying with Node, I reinvented reworked the wheel and used Ryan Dahl's (creator of NodeJS) basic chat application.  All I did was partition the client to act like it had multiple rooms rather than one group room as in the original.  That is not what this post is about. This post is about how easy it is to get a node instance up and running on Duostack.

Duostack is a super easy to use cloud platform as a service for Node and Ruby apps.  Databases that are available by default are MySQL, MongoDB, and Redis (the documentation states external DBs are welcome).  The deployments live on the Amazon EC2 by default, but there is 'cross-cloud reliability' that will allow for fail over to the Proactive Cloud in case of a possible Amazon outage.  Deployment is as simple as it could get with a cloud platform (well it could get simpler, but its super easy as you can read below). 

To setup Duostack I had to move away from Chrome OS and into Ubuntu on my Cr-48.  I followed the simple steps to get the command line interface installed.  I used the curl method versus the node package manager install and had my Duostack instance configured shortly thereafter.  So now to create a Duostack app.  This is even easier then setup of the command line client, simply type 'duostack create <yourappnamehere>' and you have it. Duostack uses Git to control deployment so deploying is also a snap, just feed the command 'git push duostack master' from your git repository, wait a few seconds while Duostack works the deployment magic, and you have your Duostack application deployed.  Mine lives here.  So far I am more than pleased with my Duostack beta access and invite anyone with interest in deploying a Node or Ruby app to a cloud platform to signup and give it a try.  I have a few other betas for platform as a service solutions to check out, but Duostack got first dibs by granting me beta access before the others.


26 April 2011

changing old habits

I have been doing a lot of development on my Cr-48 lately.  And as I sit here coding away I wanted to note how useful chrome is to me as a developer.  As I have written about previously there is a plethora of web-based IDEs to develop with in Chrome OS.  So what I have been finding particularly useful regardless of the development environment is something any chrome user (I'm talking browser now, not OS) can utilize...the Chrome Developer Tools.  Before I received my Cr-48, the majority of my browser based debug sessions lived in Firefox with the amazing and powerful tool Firebug, but thanks to Google I was forced to try something new.  I thought nothing else compared to Firebug (I am not going to speak out against Firefox or Firebug as both are spectacular), but as I have familiarized myself with the Chrome tools I find they are just as powerful and robust.  I love how easy it is to inspect an element on the page and edit CSS and JavaScript, check network events, record a timeline, or just drill through local variables in the console.  So if you are like I was, before you move from chrome to some other tool just to step through your JavaScript in the console, stop and give the Chrome Developer Tools a try, you might decide to stay.

16 April 2011

Chrome OS Everyday

Writing code in the browser with Chrome OS is an important item for me as a developer and there are a growing number of apps available to get your geek on in the cloud, but what else is awesome on Chrome OS?  Tons of things.  I have been almost exclusively utilizing my Cr-48 since early February at home, with the exception of my taxes (chrome beta/dev wasn't supported),  some photo management, the time when the developer build rendered the OS impossible to use (hooray for being a test pilot), and the occasional connection to my remote work computer.  So it is promising that I am able to find a replacement for everything I do on a computer in Chrome OS with limited exceptions.  What else?

I recently have been running some rigorous durability tests on my Cr-48, or I guess I should say Preschooler compatibility tests.  I realized this was needed when I arrived at my son's daycare to see a dozen preschoolers huddled around a computer clicking things and learning their letters, numbers, and sequences.  At home my son enjoys the stock windows Paint... a bunch.  What could I use on the Cr-48?  deviantArt muro is a cool choice although it took us a bit to get used to the track pad.  Of course the Chrome web store has many options like Poppit, a balloon popping game which really tests the durability of the track pad.  But one of my favorite apps is MeeGenius! Children's Books, which reads classic children's books out loud and highlights the words as it reads.  Our favorite kid friendly site is and has been the PBS kids site which as an avid PBS kids family is full of friendly educational games from our most familiar characters.

For me, I have recently been utilizing my Cr-48 to read books on Google Books.  It may not read super easy in direct sunlight, but I can read at night without a light.  There are tons of books, "over 3 million", which is enough to keep any reader busy for a while.  So there is plenty for everyone on Chrome OS, especially for everyday computer needs.

09 April 2011

ShiftEdit web-based IDE

I have come to the conclusion that there is plenty of selection for online application development using a web-based development environment.  After trying out several online IDE's over the last few months I was asked by a reader to check out ShiftEdit.  I had read that this was an editor of choice for many on some of the Chrome OS forums where the question of what is used to develop on the Cr-48 usually shows up.  So I decided I would try out another IDE to get a feel for how it compares to others I have tried.


First off, bonus points for allowing Google (or Facebook) login.  After authentication, this feels like a desktop IDE similar to what I feel like in CodeRun, Cloud9, or Akshell (I usually test this by going full screen on my Cr-48 and say its good if it isn't obvious I am in a web browser).  Selection of file formats is diverse and allows for PHP, HTML, JavaScript, CSS, Perl, Python, Ruby, Java, or Text with built-in FTP support, which is nice for those who enjoy diverse development.  I tried to create a trivial web page and was pleased with the HTML editor with the exception of when I tried the split view (HTML and Design viewed at the same time) I found it hard to keep the focus on the HTML screen and ended up navigating away from the editor when hitting backspace to delete a <div>.  This is not a huge deal as I would likely not develop full time in split view.  


JavaScript editing is almost too full featured for my taste by default.  There is an auto complete feature that will auto close brackets in your code as you type.  I found that I was creating double closing brackets so I turned that feature off which was easy enough in the Edit -> Preferences menu.  However,  JSLint is a wonderful addition to any JavaScript Editor, and is fully configurable in the Preferences section (so if you don't like to be forced to use === instead of == you can allow that).


A feature that I've recently learned is important to me in an online IDE is allowing for multiple tabs to be opened at once.  ShiftEdit does this well. (I have been working a lot in Akshell for some recent development and the lack of tab support is nearly a deal breaker...along with the times when I log in and all the open files disappear and I have to select the current project again to restore the view).  There are many other features that I have yet to try in ShiftEdit which could be handy, though I'm not sure I'll try them out anytime soon.  Perhaps I will never need to utilize them.  


I have found I'm no longer sure what I'll be using as my web-based development environment (most likely a combination of many, just as I develop in a desktop environment).  I am fairly certain I have seen enough for now (of course if you have found "the best" one, let me know, I'll check it out) that I will be able to find the one (or two, or three) that suits my needs best.  Recently I've been trying all these IDE's out and sticking with the current flavor of the week only to later find out certain limitations or something that I preferred in a different editor.  This is no different than using a full featured text editor outside of Visual Studio for example to edit JavaScript or XML files because I don't particularly care for the way these appear in Visual Studio.  What I really need or want in a cloud-based IDE is still being defined as each one's limitations or offerings reveal themselves through  repeated use.

03 April 2011

Cloud9 revisited

A while ago I tried to use Cloud9 IDE to code in the cloud on my Cr-48 and it was too buggy to even try to accomplish anything in it.  It now appears that the issues have been resolved.  I have been interested in learning some of the awesome that is node.js.  I could easily move to my Ubuntu partition, install and build node, and try it there.  However, I really like Chrome OS and I've really been enjoying my other Google V8 JavaScript engine based development with Akshell so why not try Node.js in the cloud too.  Cloud9 is the perfect place for this.

First let me say the the github integration with Cloud9 is super smooth.  To start editing a github based project just enter the github url and click "start editing".  So I created a new github repository and started a simple web server with node to see how it would go.  I checked out one of Ryan Dahl's (the creator of node.js) introductory videos to get a simple server created in my server JavaScript file.   Then I setup the server configuration in Cloud9 which only required me to tell it which JavaScript file to use and what command line arguments to send it (i.e. "node server.js") to get it running.  Cloud9 does not let you specify a port number like one would in a desktop environment, but they add a helpful hint when running a server "Important: in your scripts, use 'process.env.C9_PORT' as port and '0.0.0.0' as host."  So I modified the server file with the tip, clicked run and sure enough I created a node.js server.

I think using node.js on Cloud9 is up to par with any other web-based IDE.  One thing it lacks versus something like Akshell or Kodingen is the ability to deploy to a subdomain directly.  I can however build my app up (if I continue to use Cloud9 versus Akshell) and then deploy to a node.js hosting platform like duostack.  For now I plan on using Cloud9 to learn some node.js and see what things I can make with that.

26 March 2011

A Better Web-Based IDE

After a few days this week without Chrome OS due to a fun error in the Dev build (though its never bad to be able to revert to Ubuntu), I am able to be a Cr-48 nerd again.  The other day one of the three readers of this blog tipped me off on Akshell, another online development environment, which I quickly dove into in order to compare it against some of my other favorites which I have checked out previously here, here, and here.  By far my favorite has been Kodingen, I still go to it to code around and generally geek it up.  This all may change.

Akshell is a brilliant development environment that utilizes JavaScript for not only the client-side programming, but also the Server-side.  There are many cool features to how apps are developed and integrated in Akshell, which can be found in their documentation here.  I have found the environment to be amazing to use utilizing the default "ak" library and their Model-View-Controller framework.  For my first test I tried to remake (and improve) the test site I created on Kodingen with Akshell.  I found it was super fast to build with the Akshell environment and enabled me to test and preview just as smoothly as Kodingen though I think the interface with Akshell is much easier to navigate (perhaps because most of the features in Kodingen are still disabled in its current Beta state).  I must admit that I did utilize jsFiddle to quickly enhance my HTML5 canvas that I had created in Kodingen and then simply copied the JavaScript to Akshell.  So what does a quick Akshell site look like?  See mine here.

One of the promising things about Akshell that I'll be getting into soon, is their relational database (PostgreSQL) that is accessible with their "Simple JavaScript API".  From the documentation and the quick test I did with their relation variables I have to agree it is simple to use.  I hope to get some time to get an app going that utilizes this database functionality soon.

I don't know if I like Akshell an better than Kodingen as far as functionality and features (they both let you code, use a database, and deploy directly within their apps) but I can say that Akshell seems to be a more elegant solution to the online coding environment so I will definitely be using it for my next online coding endeavor.

22 March 2011

JavaScript Heaven with jsFiddle

I may have finally found the perfect tool to build and test JavaScript concoctions on the fly (or at least a really cool one). I have been utilizing Kodingen (which is awesome) to code on my Cr48 and then flipping between the JavaScript code, css, html (I know I could put these all in the same document but navigating that is more exhausting to me that toggling windows) and rendered pages to test my script, styles, and html quickly.  This can get a bit cumbersome, and flipping between tabs or workspaces can get old very quickly.

So I was reading through the Chromium blog and I watched a video of Paul Irish, a developer advocate for the Chrome team, discussing some of the cool tools using Google Chrome to develop quicker.  This sparked my interest in Paul Irish and the first post I saw on his site had an embedded example from jsFiddle.  This led me to jsFiddle.net.  Perfect.  Clean.  Awesome. 

The setup of the editor reminds me of the HTML5 playground at HTML5Rocks, only without the need to switch between views of CSS, HTML, and JavaScript.  In jsFiddle the concurrent views of HTML, CSS, JavaScript, and the current render are all visible because they are each contained in their own iframe.  I decided to try it out with a quick "hello world" test which due to the ease of use and another Paul Irish contribution CSS3Please, I was able to quickly generate this little fiddle:


Another great feature is the 'TidyUp' button which will clean up your code's indents and spacing, which is super handy if you are like me and you have moved things around or copied text in from outside sources (css3please).  Also included is JSLint which is a great utility that will examine the quality of your code and "will hurt your feelings" as it tells the user exactly what is wrong with their JavaScript.  I used jQuery as my JavaScript library of choice, but also included are Mootools, YUI, Prototype, Dojo, Glow, Procession.js, ExtJS, RightJS,  Raphael, and No Library (pure JS)... so just about any flavor you might care for.   I am sold on jsFiddle and I will likely be using it as my primary tool to fiddle with JavaScript.

15 March 2011

A Beatbox in the Sky

Recently I've been trying to find less nerdy things to do on Chrome OS.  I don't know if its because I've been boring myself when I analyze new cloud based development environments, or if its because I want to become a better advocate for Chrome OS and its purpose for everyone, but I started playing around with some cool applications.

I like music.  I like thinking I am a musician (I know cover bands don't really count, but almost...).  So when I saw in the Chrome Web Store a program from Aviary that would allow me to create music right in my fancy home in the cloud, I quickly installed it.  The interface is super intuitive (i.e drag n drop or click a button), so I was off and running.  There is about any sound you would need for a solid beat including drum kits, guitars, voices, even random sounds from around the house.  My first beat tracks were based off of the standard acoustic drum kit, but I soon moved myself to using claps snaps and an 8 bit organ (<<have a listen if you must).

So Aviary is an amazing website that has loads of amazing artist tools, not just music creation.  They have an audio editor where one can edit and mash together tracks, so the next step is to set up a drum track and try to play some music over the top of it in the music studio (or at least sample some of the creations that are out on Aviary's site).  The other tools all seem to be likely candidates for common use for my everyday clouding needs like screen capture and image editing.

Update:  Shortly after I posted the link to my sample sound Aviary's creation listening tool crashed.  I checked a couple creations from other folks and those were broken as well.  I'll update again when I see the link is working again.


Update: the link to the creation should work now.

09 March 2011

RAD with WaveMaker

Yesterday VMware announced they had acquired WaveMaker.  I had not explored WaveMaker, but luckily the news exposed this wonderful development tool for me.  WaveMaker is a tool for Rapid Application Development (RAD) that is perhaps the worlds greatest WYSIWYG editor.  Not just WYSIWYG for HTML or page layout, but it can completely eliminate the need for Java coding and with its integrated data structure mappings with Hibernate it can easily integrate with any enterprise database.  The point is that anyone who is computer capable can write a fully functional web application and maintain it without the need for developer time.  As a bonus, there is integration with the big names in cloud hosting like Amazon EC2, Rackspace, Eucalyptus, and OpSource

I checked out the example videos and was amazed.  I was especially excited because I of course noted there was a cloud version available.   Of course the site is down for maintenance without any idea as to when service would be restored.  Being an avid user or Chrome OS on my Cr-48 I was extremely bummed.  So I decided to  cheat a little (its still browser based app development, however it required installing software) and I cranked up developer mode on my Cr-48 and entered my Ubuntu Linux boot.  I downloaded WaveMaker and kicked it off.  

Amazing.  I created a test project with one of the provided templates and started dragging objects onto my web page.  Styling is available at the click of a button, and wiring up events to buttons exposes so special handling can be added.  I can already grasp the power of this tool and I have not spent a whole hour in it.  I can imagine in the coming days and weeks as I get the chance to get more familiar with it, I will be even more amazed.  I am also excited for when the cloud.wavemaker.com site is operational again when the true power of being able to code an application in the cloud and even deploy to a cloud host like EC2 without leaving the comfort of the browser.

03 March 2011

Remotely Coding

A few weeks ago I wrote a review of some web-based tools to remotely control my PC from my Cr-48.  I have to admit that after spending a real work day remotely coding while using my Cr-48 to connect to my PC at work, the win has to go to LogMeIn.  I had thought I could ignore some of the minor issues of TeamViewer because I really enjoyed how simple it seemed, but the character mismatches from what I typed on this end to what resulted on my work PC were not tolerable.  So I think the results should really be that TeamViewer is a simple solution for perhaps remotely helping a relative with an issue on their PC, but for coding remotely, my vote is now entirely for LogMeIn.

02 March 2011

Coding in the Cloud: Part ?

"your Cloud9 beta account has been activated".  I had been anxiously awaiting this email (although one can sign up now without a wait period) to continue my quest to find the best coding environment for use with my Chrome OS on my Cr-48.  Cloud9 is another development-as-a-service platform that claims to be the go to solution to marry HTML5/JavaScript development with github and has received some decent reviews lately after  its presentation at DEMO Spring 2011.  So I had to login and get coding.

I followed the link provided and once signed in I was able to quickly create a new project.  I added an html file and a JavaScript file to create a simple "hello world" website to test how the cloud9 development environment worked.  I saved my work, then clicked "Preview" and my boring website was previewed in a new tab.  Everything was working well until I returned to my project files and decided I wanted to rename them from untitled.html and untitled.js to test.html and test.js.  Moments later as I was about the check out the "Run" and "Debug" options mysteriously the screen flashed and the files were once again named as the default "untitled".  I saved the project to return later and investigate.

So I signed back in to my account and saw my previously saved project and selected "Open".  This took me to the sign in screen only the styles were all gone and it was a bunch of blank screen with the login box.  I of course had to try again, and after repeating this behavior a few times I thought, "maybe this is because its a beta account".  So I created a new account and thought "at least I can get a test project started to my testing so I can do a good comparison of cloud9 with kodingen and coderun" but I was not able to create a project at all.  I tried to use the shared github project that cloud9 provides as an example and that to failed.

Apparently cloud9 is getting hit hard with tons of new users who are experience some issues similar to mine, at least according to some of their twitter posts.  I'll be anxious to get a real review of this cloud based development environment because in my brief time on the inside, it seemed very easy to use and elegantly constructed.

20 February 2011

Coding in the Cloud: Part II

Coding in the cloud is something I feel I need to be able to do easily now that I'm utilizing my Google Chrome OS notebook.  Last post I discussed utilizing an online development environment called CodeRun and found it to be quite useful, but it is not my favorite cloud development environment.  My favorite (so far) is called Kodingen.

Kodingen is "The Cloud Development Environment, Online Code Editor, Cloud Hosting, Web-based access to file system, Web-based ftp & svn integration" or at least it will be all of those things.  Currently Kodingen is in Beta v3 so not all of those features are available as of this writing.  Even though this cloud development environment is not fully operational it is still fantastic.  As shown on their site, there is code support for php, perl, and python [with future support of django, ruby on rails, fastcgi,...].  The site you create is hosted on Kodingen, and they offer a default 500mb of diskspace, 1000mb of monthly traffic, 1 domain, 6 subdomains, and 5 databases by default (of course you can "get extra resources").  So I set out to play around with Kodingen.

Setting up an account was easy enough, so I logged in an got to work.  I quickly created a website with an HTML5 canvas star field plastered on it all from the comfort of my Cr-48.  As far as code editor selection, currently there is support for Bespin, CodeMirror, and Ymacs.  I found that CodeMirror suits my needs best, though I might have been inclined to choose Bespin (probably because of its name), but it lacks good support for copy/paste in Google Chrome.

A couple features I have not utilized more than a simple evaluation are the database support and the image editing.  Creating a MySQL database was a snap (PostgreSQL, and SqLite support to come) so I created a simple database with a couple tables that seemed to perform well enough.  Image editing is currently supported using Pixlr (support for Aviary to come) and again seemed to perform well enough.  Kodingen also reports future support for code repositories such as svn, git, and mercurial where one can create teams to manage joint coding efforts (can't wait to try it out).

So after my week of trialling CodeRun and Kodingen, I must lean toward Kodingen based mostly on personal preference, but I feel that both systems create a sound cloud based development environment.  As I mentioned in the last post I think these systems would be ideal for educators wishing to introduce their students to web development or as a great code on the go environment.

17 February 2011

Coding in the Cloud: Part I

As a web developer I feel tethered to my desktop workstation, sure I can work remotely, but how can I code in the cloud without the need for a desktop development environment.  There are several cool tools for cloud-top development environments two of which I have been trialling recently.

CodeRun is a development platform for three main types of applications, C#, JavaScript, and PHP.  To get started all you need to do is go to the CodeRun IDE select "New" and you can choose the project template of your choice and go.  Most templates start with a clever label or button as a started, for example the jQuery UI project template starts with a "HelloWorld" dialog.

One can also upload an existing project which I have stored elsewhere and get to work.  This could be a great alternative to remotely connecting to an office based IDE and coding through that connection.  With the CodeRun platform the user has access to debugging tools and an in browser secure "temporary sand-boxed environment" in which to run your projects.

In my opinion a fantastic feature of this platform is the repository of code samples.  CodeRun allows a user to share their code, assigning it a unique URL that the user may share.  Just browsing through these projects would give a developer a great view of the power that this tool holds, or ideas for their own projects.  I could see this as a great way for educators to get students to learn programming, without a need to buy/download/install massive amounts of expensive applications.  A student could code their program and turn it in by sending their linked URL to their instructor for grading.

So I think that CodeRun is a powerful application that is great for all levels of developers or even those with no experience coding who want to learn a new skill.  Go for it.  Happy Coding!

14 February 2011

To The Cloud?

I want to maximize my time in the cloud, but as a Software Engineer, I currently spend a majority of my day developing web applications tethered to a desktop development environment loaded onto a workstation running a popular operating system developed in Redmond, WA.   This is a fine environment when I am capable of getting to my cubicle at the office, but when a massive ice storm (as an example) prevents my journey to the office park, I must be able to work remotely.  

There are many solutions to this problem, and most require some form of secure connection to my work network followed by a remote desktop session to control my machine at the office.  Traditionally (before my chrome notebook) I had no reservations doing this as an adequate means to get my work done.  On my Cr-48 my traditional methods of remotely connecting to my workstation are not possible, so I set out to find my new solution, a web-based remote desktop solution.

There are plenty of these remote desktop solutions to choose from.  A popularized method in recent commercials stating "to the cloud" is not applicable here since it would require a cloud connection via "Internet Explorer 6 or later (32-bit version only)", which is probably not how I'll be connecting using my Google Chrome OS notebook.  A couple of other web applications that will allow remote access that I have tested since getting my Cr-48 are LogMeIn and TeamViewer.

After trying out both of these I think I'll settle on TeamViewer if I need to connect remotely.  This application is extremely user friendly and quick to set up.  Download the installer onto your remote PC, get the connection information, log into the web access site and you are looking at your remote PC.  Just as with other remote connections it seems to lag a bit but I was connected and able to navigate my applications remotely without much trouble.  I did experience one minor issue where the character mappings from keyboard input were a bit off, i.e.  '/' key became '§' but still nothing to prevent me from utilizing TeamViewer in a pinch.  

After going through all of this I feel that my real goal should be to get all of my work including the code base to the cloud so no matter where I am, what computer I'm sitting behind, I can get to work.  Thats what I plan to do next with some amazing new tools like KodingenCodeRun, and once I get my hands on the beta, Cloud9

12 February 2011

Want a Chrome OS notebook? There is still a chance you could get one.

This morning Google sent out massive amounts of spam to us Cr-48 pilot program members as they published the posts of a new chrome notebook pilot program users group.  Sure it was a lot of emails, but Google has sent out an apology email explaining how it all happened.  Apparently a user found the group which was configured such that when he posted to the group it auto emailed everyone subscribed (some 25k members), who then replied causing more emails to flood in.  There are a couple of interesting points I have gathered from this incident.

1) A post I read was from users who have yet to receive a Cr-48.  This is either a really mean mistake by Google, or more likely, the users should make sure they check their front door for UPS deliveries in the coming week(s).

2)  There are only approximately 25,000 users.  This means if Google is keeping its word on delivering 60,000 for the pilot program there are plenty of users who signed up for the pilot that can still hope for a delivery in the coming weeks or months.

So for those of you who are wishing to join me and my 25,000 friends in testing the amazing Chrome OS on this lovely Cr-48 notebook, you still might get the chance.

11 February 2011

cloud anywhere

A Wi-Fi connection is pretty easy to find just about anywhere these days.  There are however times when it might become necessary to get into the cloud by other means, and luckily the folks at Google were clever and kind enough to equip the Cr-48 with the means to do so with its Gobi 2000 3G radio and 100MB/mo of free Verizon Wireless access.  So I set out to activate this cloud anywhere service.  This was a very easy task with one tiny hangup that made it just a little annoying, but still simple.

I was able to view 'Activate Verizon Wireless' from the network status menu in the upper right.  I clicked it and a page opened with helpful information about how the service was being activated...it might take a few minutes...and it was quick and easy (along with a friendly comment about how they were striving the make it quicker and easier).  Sure enough a few minutes passed, I had a couple of bars showing I was connected to Verizon, but my account settings showed "partially activated" with an  message stating there was a slight problem (I can't imagine how partially activated wouldn't be) and a number to call if the problem persists.

Not being one to call customer support the first time I get an information message like this, I clicked 'Activate' again and was greeted again with the friendly connecting message followed by the unsurprising "there was a problem" message.  So I called the number.  I was greeted by the friendliest computerized voice telling me the number provided is not available in my area so I should call a different number (awesome).  I did that got in touch with Colin (or something) who kindly asked my situation but cut me off when I said anything related to Google, Cr-48, chrome notebook, and asked "is that like a tablet or something?".  Clearly he was not the person to talk with, but I eventually got patched through to technical support and Nick who had clearly dealt with this before. After I dodged the standard up-sell to a higher data plan, I was granted access to the 3G wonderland (at least what 100MB/month will get me).  

The connection has not let me down yet.  In my few days of testing I have shut down my wireless connection and the 3G seamlessly picks up and quickly eats into my data plan. I can see the options of having unlimited all day access ($9.99) or a higher rate (up to 5GB/mo for $49.99) to be quite tempting if I were ever: a) stranded somewhere without Wi-Fi and really needed to get in the cloud, or b) I did more than go from Wi-Fi at home to Wi-Fi at the office.

10 February 2011

Home in the Cloud

Three days ago I received a marvelous gift from Google in the form of my very own CR-48 notebook.  In December I had submitted my application to the Chrome OS pilot program, crossed my fingers, and a half dozen weeks later was lucky enough to receive my very own chrome notebook, and it is amazing.

This stealth notebook comes complete with a fledgling operating system (chrome os) that is proving to be powerful enough for all my everyday computing needs.  The boot time is remarkable, with the removal of standard operating system boot bloat, Chrome OS is running in ~10 seconds.  There are plenty of sites discussing the specifications of this device in detail, and I am not going to review the device here.   Other reviews state this device and the Chrome OS are dead in the water, but so far I have to disagree.  I can see a bright future for a fast, affordable, notebook with a lightweight operating system designed so that no matter what my location, I am able to connect to the cloud quickly and accomplish all the tasks I need to. I am going to push this device to it limit and see what, if any, limitations it has.

I have been courting the cloud for some time, working in Google Docs, syncing photos to the web with Picasa, and loading a lightweight linux distro on an old HP laptop for nothing but netbook purposes, but now with the chrome notebook and Chrome OS I am going for a more committed relationship, attempting to detach myself completely (or as much as possible) from the standard operating system and live in the cloud.